Portainer is a free Docker Container management tool with compact size and intuitive management interface, simple to deploy and use, allowing users to easily manage Docker host or Swarm cluster. This tool works on a container deployed on Docker Engine.
Grafana is a leading time-series, an open-source platform for visualization and monitoring. It allows you to query, visualize, set alerts, and understand metrics no matter where they are stored. You can create amazing dashboards in Grafana to visualize and monitor the metrics.
Prometheus is an open-source time-series monitoring system for machine-centric and highly dynamic service-oriented architectures. It can literally monitor everything. It integrates with Grafana very smoothly as Grafana also offers Prometheus as one of its data sources.
Prometheus Architecture: At its core, Prometheus has a main component called Prometheus Server, responsible for the actual monitoring work.
The Prometheus server does all the hard work and Grafana displays the information as a front end.
The Prometheus server consists of:
- Time Series Database that stores all the metric data like current CPU usage, memory usage etc.
- Data Retrieval Worker is responsible for all the data pulling activities from applications, services, servers etc. and pushing them into the database.
- HTTP Server API meant to accept queries for the stored data. The Server API is used to display the data in a dashboard or a Web UI.
It is assumed you already have docker and portiner installed on your host
- Portainer can be directly deployed as a service in your Docker cluster
1. Deploy Prometheus and Grafana
Login to Portainer, Create a new stack and define or paste the content of your docker-compose file in a box web editor.
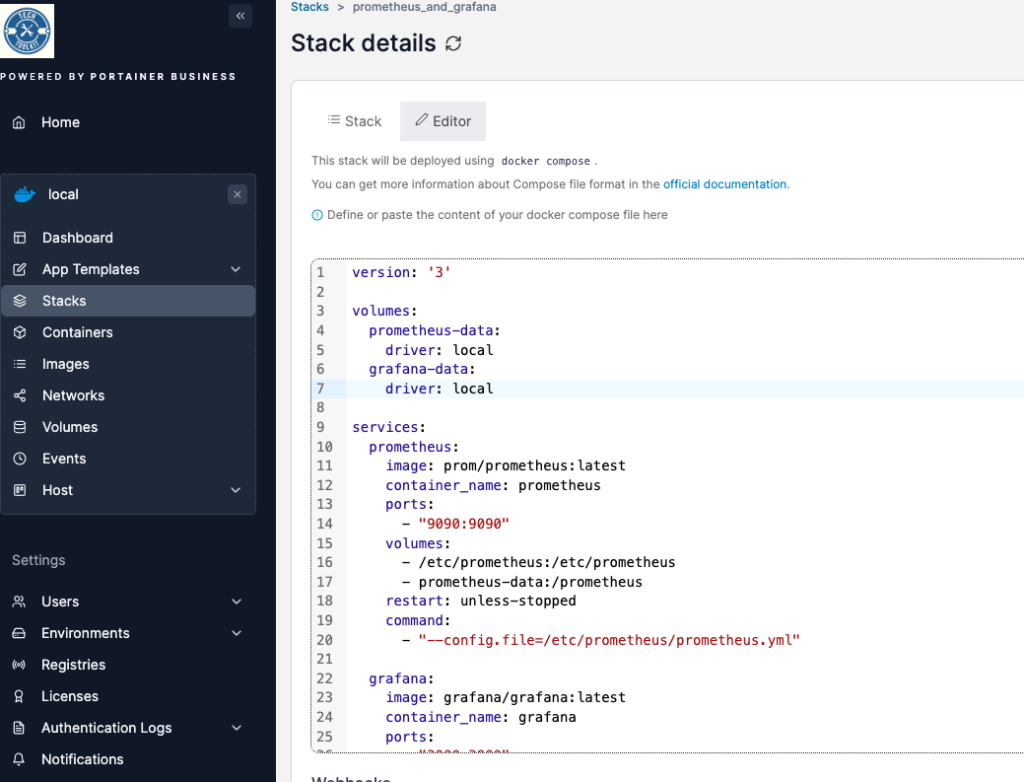
version: '3'

volumes:
  prometheus-data:
    driver: local
  grafana-data:
    driver: local

services:
  prometheus:
    image: prom/prometheus:latest
    container_name: prometheus
    ports:
      - "9090:9090"
    volumes:
      - /etc/prometheus:/etc/prometheus
      - prometheus-data:/prometheus
    restart: unless-stopped
    command:
      - "--config.file=/etc/prometheus/prometheus.yml"

  grafana:
    image: grafana/grafana:latest
    container_name: grafana
    ports:
      - "3000:3000"
    volumes:
      - grafana-data:/var/lib/grafana
    restart: unless-stopped
2. Configure Prometheus
Configuring Prometheus to monitor itself, run the following comms from the linux host machine
sudo mkdir /etc/prometheus
sudo nano /etc/prometheus/prometheus.ymlglobal:
scrape_interval: 15s # By default, scrape targets every 15 seconds.
# Attach these labels to any time series or alerts when communicating with
# external systems (federation, remote storage, Alertmanager).
# external_labels:
# monitor: 'codelab-monitor'
# A scrape configuration containing exactly one endpoint to scrape:
# Here it's Prometheus itself.
scrape_configs:
# The job name is added as a label `job=<job_name>` to any timeseries scraped from this config.
- job_name: 'prometheus'
# Override the global default and scrape targets from this job every 5 seconds.
scrape_interval: 5s
static_configs:
- targets: ['localhost:9090']
# Example job for node_exporter
- job_name: 'node_exporter'
static_configs:
- targets: ['node_exporter:9100']
# Example job for cadvisor
- job_name: 'cadvisor'
static_configs:
- targets: ['cadvisor:8080']Third-Party Exporters
https://prometheus.io/docs/instrumenting/exporters/
Node_exporter is one of the exports that help prometheus collect metrics of the machine to be monitored and installed on the target machine (the machine being monitored).
cAdvisor is to analyze usage, performance, and many other metrics from Container applications, providing users with an overview of all running containers.
At stack monitoring we need to add the content config of cadvisor and node_exporter to the docker-compose file then update the stack.
node_exporter:
    image: quay.io/prometheus/node-exporter:latest
    container_name: node_exporter
    command:
      - '--path.rootfs=/host'
    pid: host
    restart: unless-stopped
    volumes:
      - '/:/host:ro,rslave'

cadvisor:
    image: gcr.io/cadvisor/cadvisor
    container_name: cadvisor
    # ports:
    #   - "8080:8080"
    volumes:
      - /:/rootfs:ro
      - /var/run:/var/run:ro
      - /sys:/sys:ro
      - /var/lib/docker/:/var/lib/docker:ro
      - /dev/disk/:/dev/disk:ro
    devices:
      - /dev/kmsg
    restart: unless-stopped
Once the stack is up you should be able to see them all showing in Portainer

When logging into Prometheus you should now see all targets
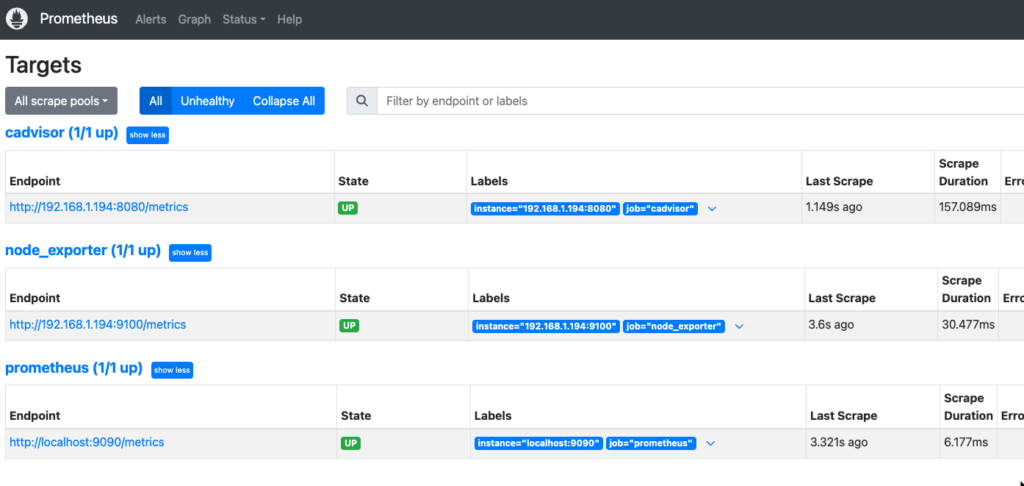
Login to your new Grafana instance, default username and password admin/admin
Add Prometheus as a source
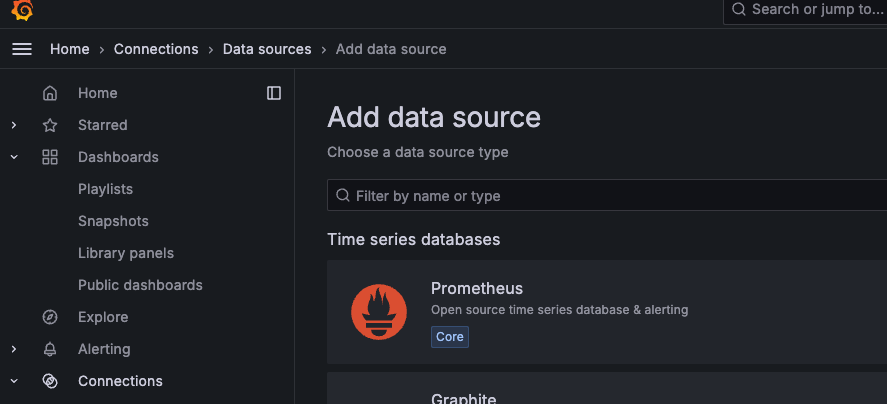
Go to Grafana to look for dashboards: https://grafana.com/grafana/dashboards/
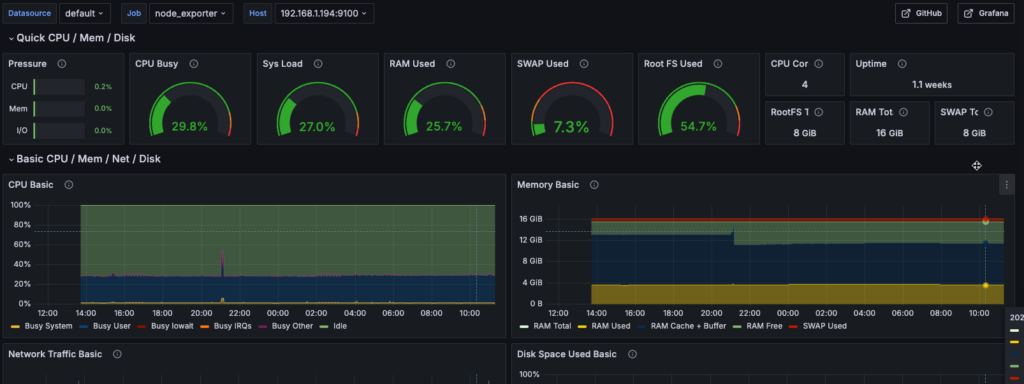
Node Exporter – copy this dashboard ID: https://grafana.com/grafana/dashboards/1860-node-exporter-full/
Import dashboard intoyour local Grafana instance, use the ID copied from the website and then choose Promethus as the source


